How to sell your online course on Vibeland
Have a recorded illustration workshop, a talk on typography or a painting course you want to sell? On Vibeland you set up the course, set the price and publish it on your own, in the same dashboard where you already sell tickets.
What you can sell
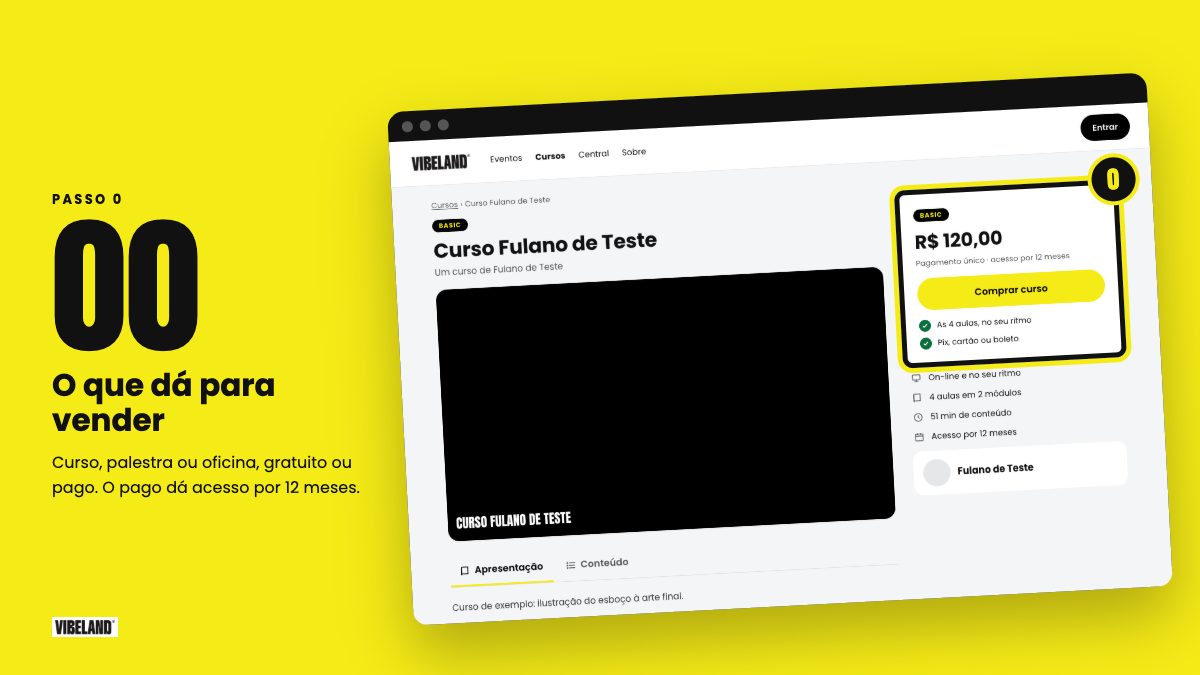
A course, a talk or a workshop, free or paid. On a free one, people tap Watch and start right away; they only need an account. On a paid one, the purchase unlocks access for 12 months from the payment. And if you have more than one paid course, you can put them together in a bundle, for less than the sum.
1. Create the course
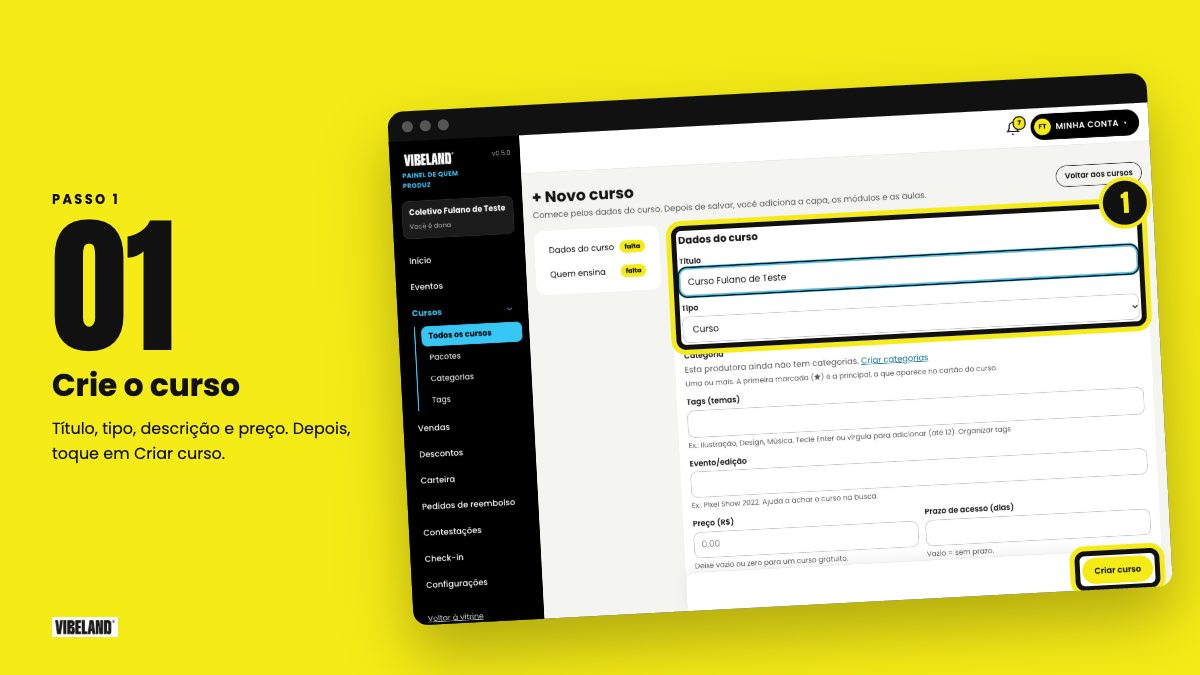
In your dashboard, go to Courses › All courses and tap + New course. Fill in the Course details: title, type (course, talk or workshop), description, what people will learn and the price, then tap Create course. The same screen has the categories, the tags and the Who teaches block, with photo, name and a short bio. The cover comes in after the first Create course. Until you publish, the course stays as a draft and only you can see it.
2. Build the modules and lessons
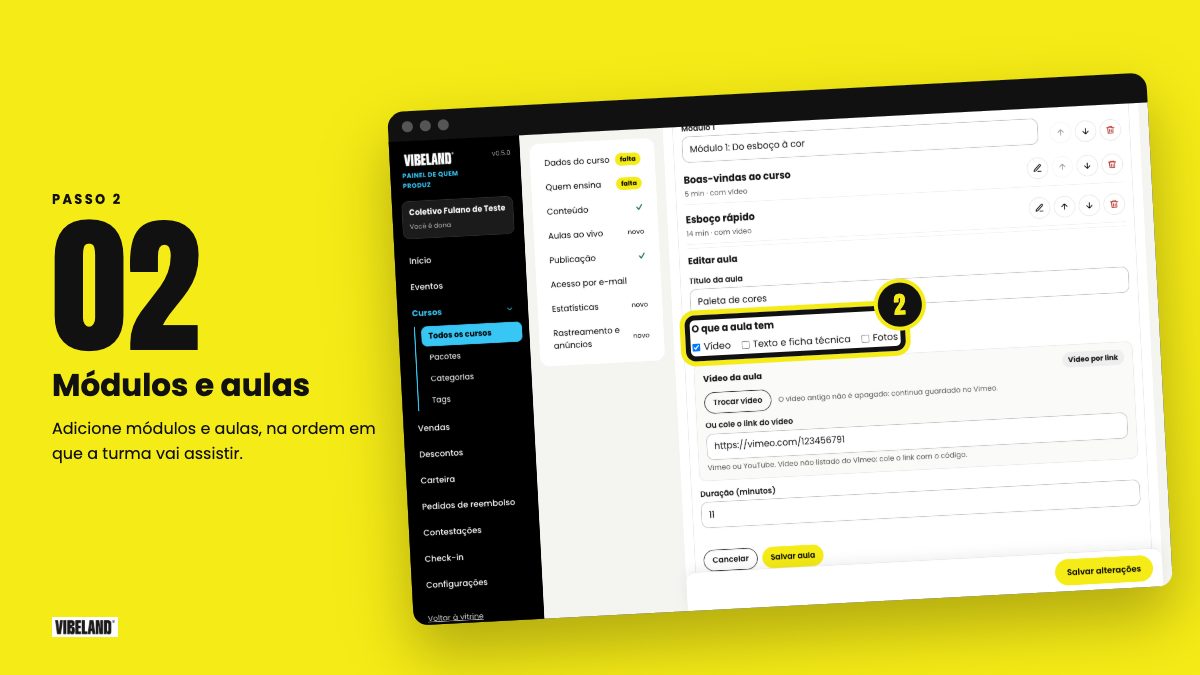
In Content, use Add module and + Add lesson, in the order the class will watch. In What the lesson has, each lesson can have video, text and credits, photos, or all of them. You can make a lesson with only process images and the credits of a project, with no video at all.
3. Add the videos
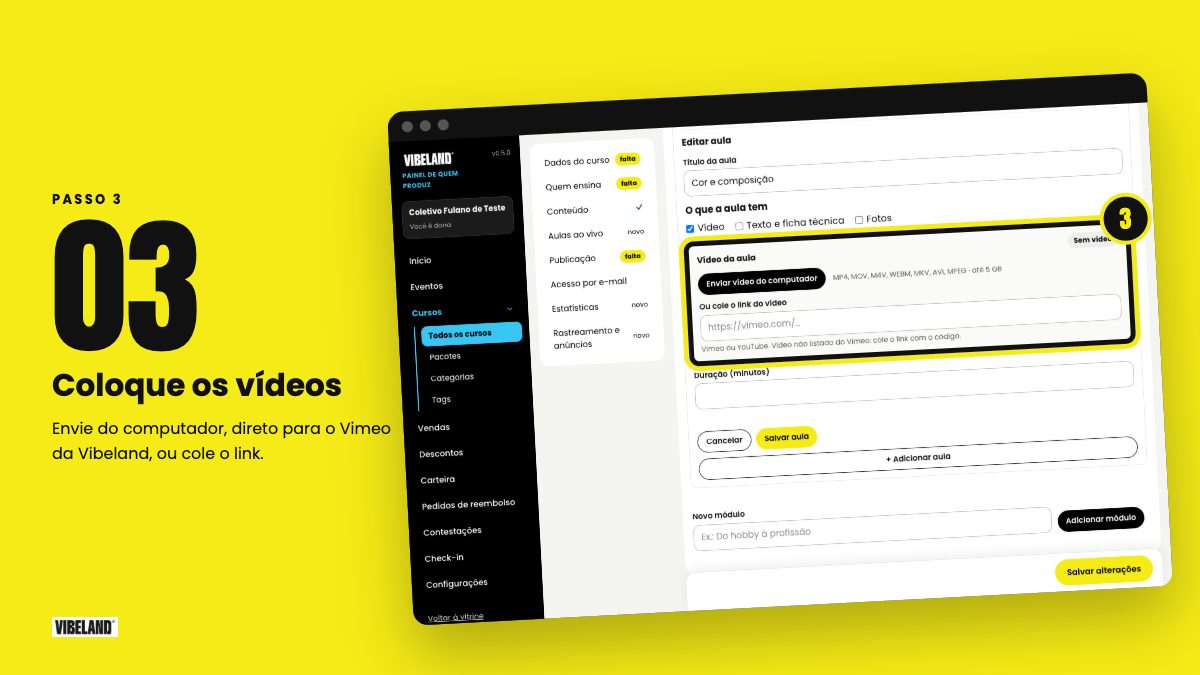
There are two ways. With Upload video from computer, the file goes straight to Vibeland's Vimeo, with a progress bar, and the upload picks up where it stopped if the internet drops. Meanwhile, you keep editing the course. If the video is already on Vimeo or YouTube, just paste the Video link.
With a video uploaded from the dashboard, the lesson length fills in on its own, and you choose the video cover: a moment from the video itself or an image of your own.
4. Schedule a live class
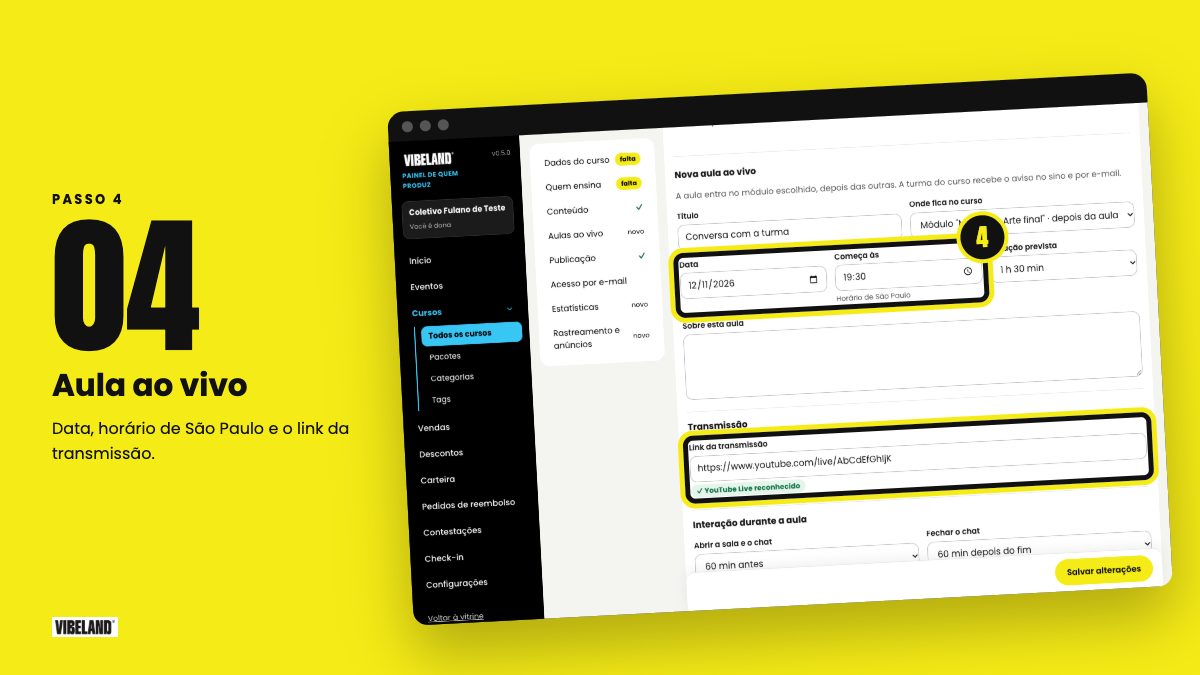
Want to talk with your class? On the Live classes tab, tap + New live class and pick the module, the date, the São Paulo time and the stream link. YouTube Live and Vimeo play inside Vibeland; Zoom, Google Meet and Teams open outside.
During the class, people have chat, questions for the teacher and polls. In Moderate, you pin messages, delete, mute and show a question over the video. When the class ends, you choose what stays in the replay. The class gets a notice in the bell when the live class is scheduled.
5. Price, showcase and publishing
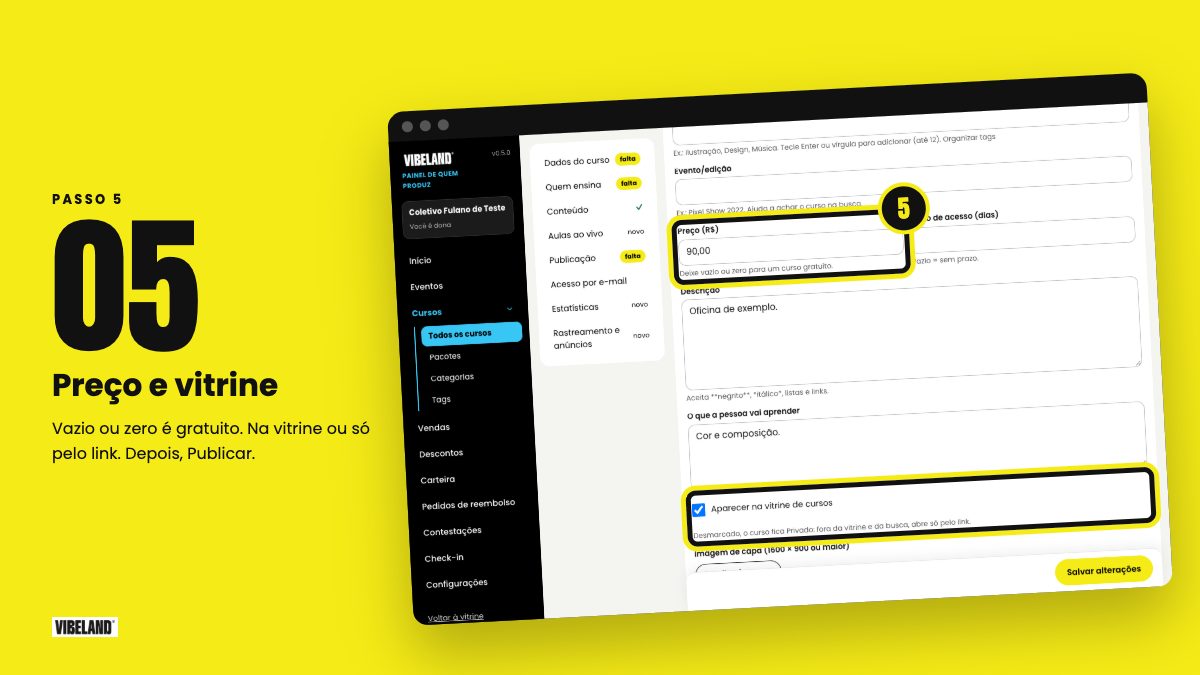
In Price (R$), leave it empty or zero for a free course. With Show in the course catalog checked, the course goes into the catalog; unchecked, it stays private and opens only through the link, good for a closed group. With at least one lesson ready, tap Publish.
Want to give the course to someone as a gift? In Access by email, type the e-mail of an existing account and tap Give access.
What your class finds
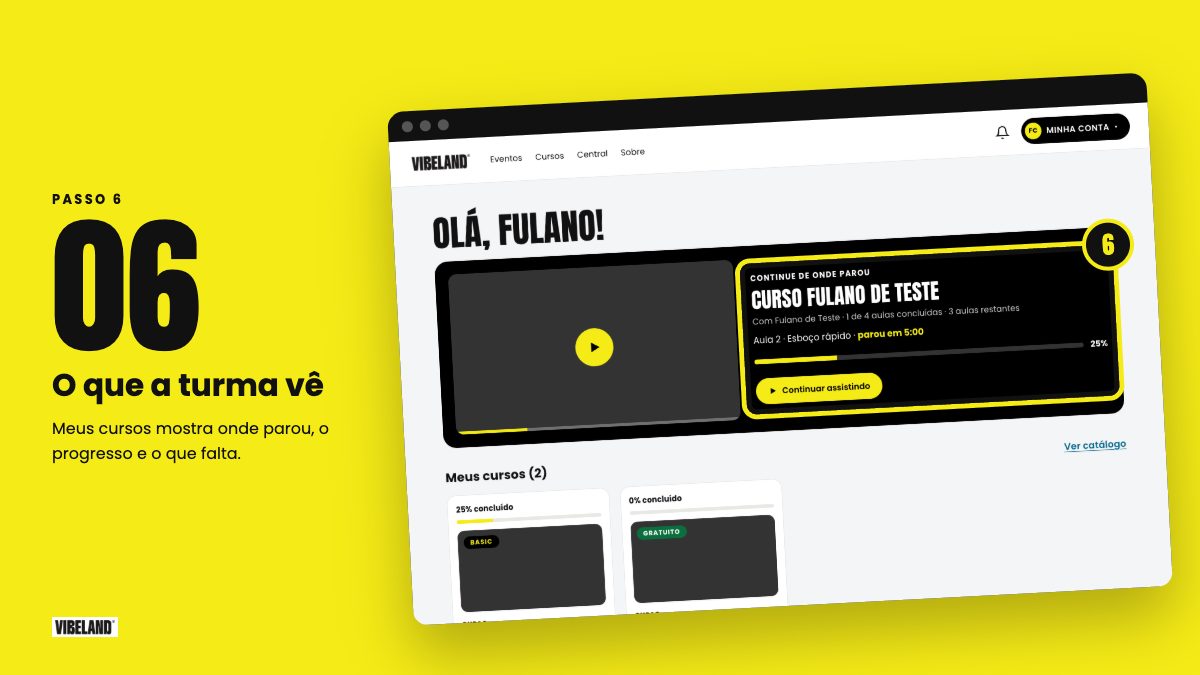
Everything is in My courses: the course to continue where they left off, the progress bar and the lessons still to watch. The video goes back to the minute where the person stopped, and each lesson has Mark as completed.
In the lessons, the Notes tab keeps notes with the video time. Only the person sees them. Clicking the time takes the video back to that point. Later, in My notes, people can search and export everything as text, Word or PDF.
How you get paid
Buyers pay with Pix, card or boleto, in the same checkout as tickets. Once the payment is approved, the course opens right away and the confirmation arrives by e-mail.
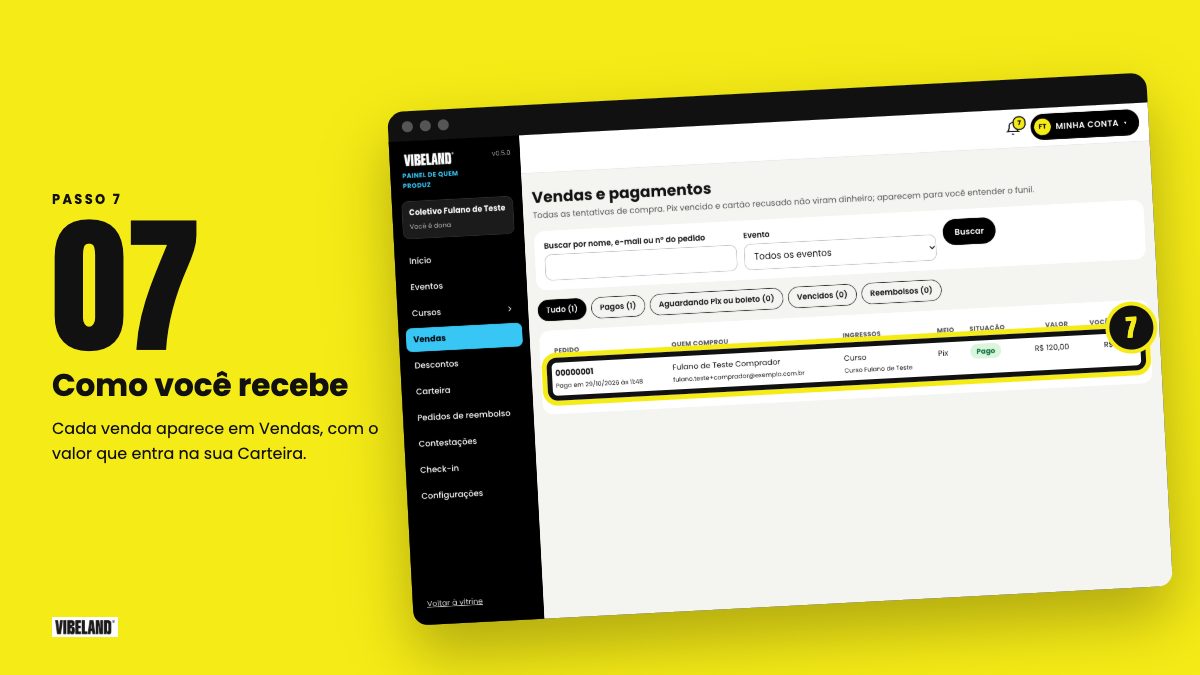
A free course costs nothing. On a paid course, the Vibeland fee is 8% on the Basic plan (10% on Black) and is already inside the price: buyers pay exactly the amount you set. The fee already covers the cost of card, Pix and boleto paid in full. Each sale shows up in Sales and the amount goes into your Wallet.
Buyers can ask for a refund in My courses up to 7 days after the payment. The full amount goes back and access to the course ends. After that, the person can talk to you, and you decide: if you want to give the money back, use Refund this sale, in the sale details.
Shall we start?
In Courses › All courses, tap + New course and start with the first module. You can save and come back as many times as you like before publishing.